What Does “Descale” Mean on Your Keurig?

Don’t panic when your Keurig’s lights blink, or when it gives you any kind of alert. It’s not dead, it’s just trying to communicate with you. And you don’t need to call the manufacturer or a coffee machine repair guy, just yet; it’s too early for that. You can go through the user manual to familiarize yourself with possible errors, but it’s not necessary if you want this issue gone now!
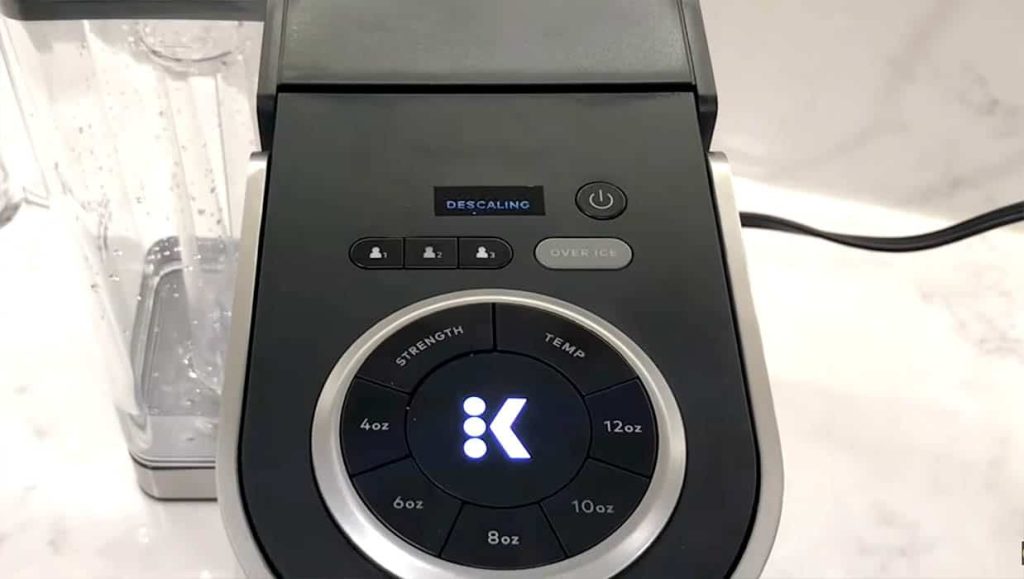
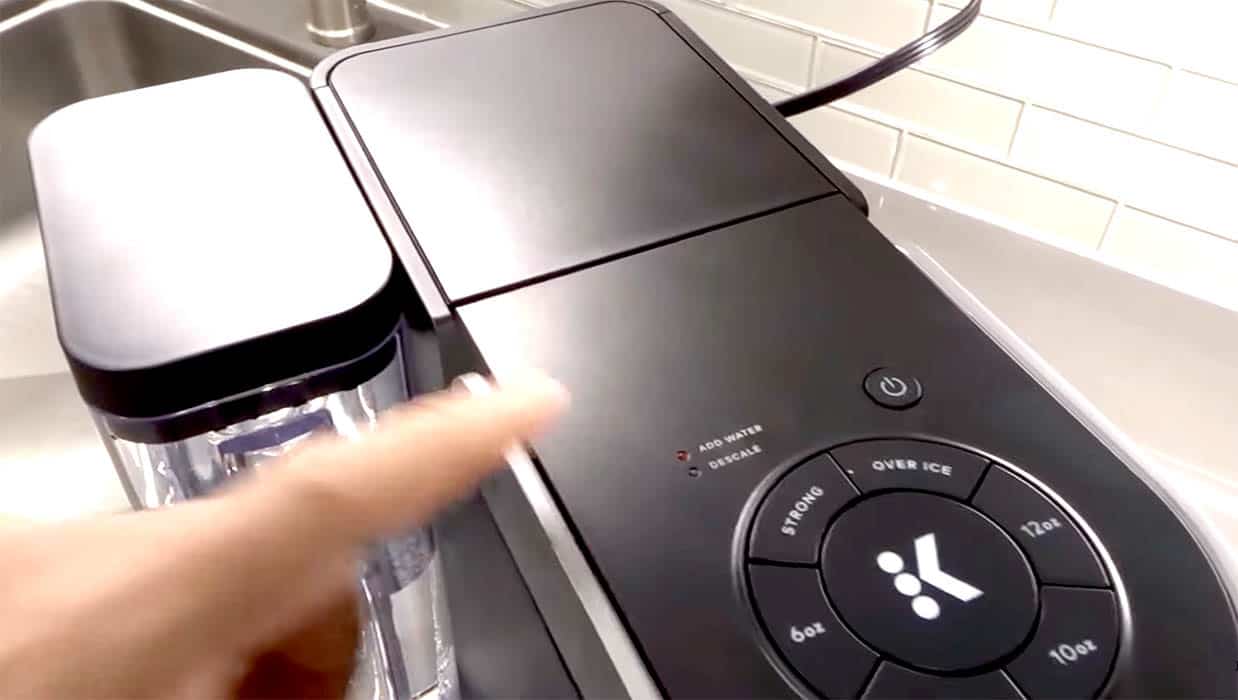
What does the descale light mean on your Keurig — or, for the owners of a 2.0 model, what does it mean when you get the message to descale your Keurig?
Your Keurig coffee pot is probably clogged, and I’m here to help you fix that like a pro. Stay with me as I take you through the descaling process and help you learn more about this issue.
About the Descale Feature on Keurig
The descale light is a feature on the Keurig that helps you know when the coffee maker needs to be cleaned. If it comes on it’s a sign for you to descale your Keurig before using it again, but not every descaling process works.
Sometimes you will run the descaling process to fix the issue only to get the descale message again immediately. Don’t panic when this happens; there’s still more you can do to bring your Keurig back to its fully functional state — we’ll get to that later.
Meanwhile, I’m sure you are wondering what turns this light on. Let’s find out.
What Does the Descale Light Mean on My Keurig?
Top on the list of things that could set off the descale warning is a clogged or blocked water line. It’s not unusual for particles to be stuck in the machine’s inner parts. Water, even the purified type, has minerals such as magnesium and calcium that build up over time in the water tube forming limescale deposits that end up interfering with the natural flow of water.
Your refillable K-cups could also be the culprit. Don’t pack them too tightly or tamp too hard, because you may restrict water flow, causing the descale light to turn on.
As you use your Keurig, be aware that at some point the descale message will come on. When this moment comes, be sure to follow the steps below.
What to Do When the Keurig Descale Light Turns on
You should descale your Keurig once every month as a general rule, but things don’t always go as planned. Whether it’s the right time to descale or your coffee maker flashed the lights earlier, the descaling procedure is the same.

Step 1: Disable the auto-feature (if on), switch off the Keurig, and then unplug it.
Step 2: Drain the water filter inside the coffee maker and remove it.
Step 3: Pour the descaling solution (or a mixture of water and vinegar) into the reservoir to clean the gunk and clogs inside the unit.
Step 4: Turn on your Keurig and place a mug on the drip tray (make sure the k-cup compartment is empty).
Step 5: Press and hold the brew button.
Step 6: Empty the dispensed water into a sink.
Step 7: Rinse the water reservoir thoroughly with water.
Your Keurig should be clean now, but if the light stays on, you’re only halfway done.
What Does Descale Mean on a Keurig If the Light Stays on?
This is common in most Keurig coffee makers. When the descale light stays on after the first descaling process, it means that the cleaning wasn’t completely successful and you have to reduce the scale build-up further.
Fortunately, the procedure is the same for all Keurig models. Just repeat the seven steps above again (or a few more times) to descale your machine further. If the descale light still doesn’t go off, though, that’s a sign that your machine has more underlying issues and you should contact the Keurig support line.
When Descaling Fails to Work
A change of strategy may be needed at this point, assuming you have been using either the descale solution or the water-vinegar mixture. It’s possible that your scale build-up is too stubborn to be shaken off by these solutions.
This is easy to deal with. Follow the steps above again, but let the solution sit in the reservoir for an hour or two before you activate the descaling. You can also use a stronger solution such as citric acid if the limescale is exceptionally stubborn.

In addition, keep in mind that the descale light only means that water isn’t flowing as naturally as it should. Often this is due to build-up in the machine, but if that isn’t the problem your goal should be to figure out what’s restricting the natural flow of water. Remember, there is more to cleaning your Keurig than just descaling.
The blockage could also be the Keurig exit needle. This is what pierces the top and bottom sides of your K-cups, and coffee grounds or other junk often find their way into the needle, blocking the waterline and restricting the flow of water.
The good news? You can fix this with ease as well. Find a paper clip, safety pin, or an item of similar size that won’t break, and push it straight into the needle holes. This will dislodge any junk that is stuck inside.
Run water through the needle afterward to flush out any remains. You can go ahead and activate settings for a large cup, then run the machine (without a K-cup) to clean the needle holes further.
Frequently Asked Questions
How Often Should I Descale My Keurig Machine?
Keurig recommends you clean the inside of your unit every 3-6 months, but also check the mineral content of water in your area. If it’s high, you will have to shorten the cleaning interval to monthly.
Routine descaling not only prevents scale build-up but also makes sure your Keurig machine works properly and the coffee coming out of it tastes fresh and nice.
Don’t wait that long to do regular cleaning, though. Rinsing the water reservoir, for instance, should be done daily. Other parts such as the K-cup holder, drip tray, and the machine’s body, can be cleaned on a weekly basis.
As you descale, remember to also clean the exit needles. Lastly, if you use your Keurig regularly, it’s a good idea to replace the water filters every two months. Check your user manual to learn more.
How Do You Descale a Keurig 2.0?
To begin, gather all the items needed for the process. You are going to need a Keurig cleaning solution or a mixture of water and vinegar, a measuring jug, a large mug, and access to a sink.
Next, take time to learn how to descale a Keurig 2.0. It’s not a delicate process, but you have to get the measurements and steps right. Familiarize yourself with the two main methods: using the Keurig cleaning solution and using a water-vinegar mixture.
Neither of these methods is better than the other, but there are some subtle differences between the two that you don’t want to miss, such as costs and implications on manufacturer warranty. Nonetheless, both are easy to carry out.
Why Won’t My Keurig Turn on After Descaling?
When your Keurig fails to turn on, first check if the power cord is properly connected to power. If it’s connected but the machine can’t power up, try different power outlets just to be sure that the issue isn’t external.
Once you have confirmed that the power outlets are fine, press and hold the machine’s power button for about 10 seconds. If you have the type that uses a switch, flip it. Normally this should activate the display or touch screen, but if nothing happens, there’s one more thing you can do.
Disconnect the unit from power and take out the water tank. Leave the machine to sit still for about an hour before plugging it in again.
Should that fail, you have two options left: take it to a coffee machine specialist for repairs, or replace it.
One Last Thing
Now you know and understand what descale means on a Keurig.
Descaling is a huge part of your maintenance routine for your Keurig machine, no matter what model you have. Even if your Keurig hasn’t flashed the descale light yet, soon or later it will, and the only way to make sure it continues to serve you well is to heed the message it tells you and just descale your machine.
Owen is a writer and editor at Caffe Streets who considers himself a coffee fanatic. He spends his time researching and testing different coffee beans and brewing methods and sharing what he learns with others.


