How to Make Espresso in a Moka Pot: A Complete Guide
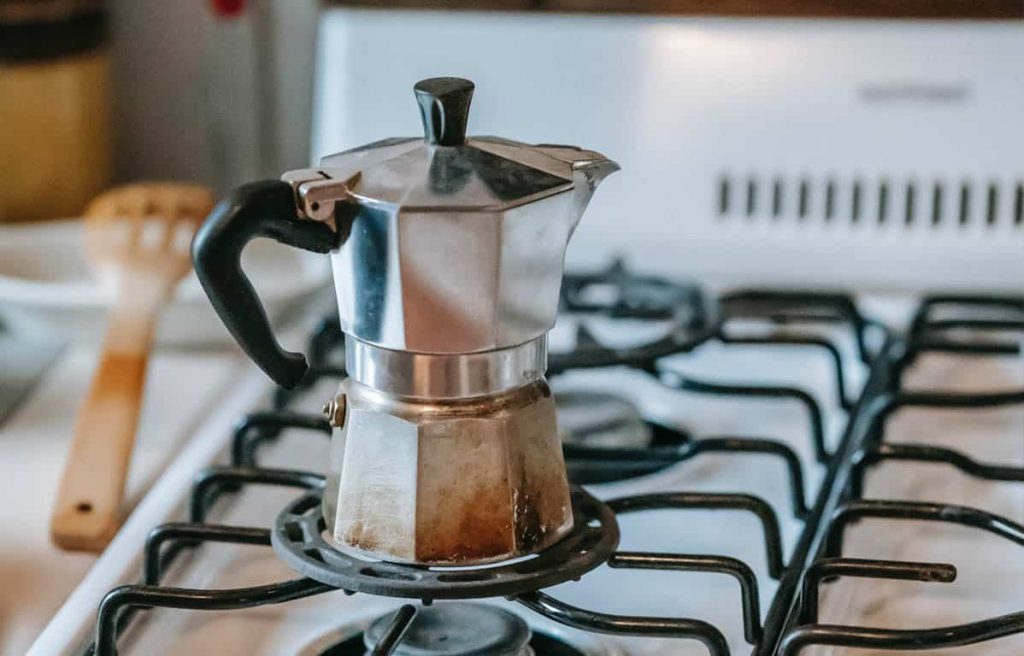
The art of making espresso doesn’t change, even when you are using the simplest of coffee makers. You have to follow the rules and rituals, which is why I have come up with this guide on how to make espresso in a Moka pot — well, not espresso technically, but something pretty close.
You will hardly come across a coffee maker that can make you espresso-style brews as simple and cheap as a Moka pot. It may not make you an authentic espresso with delicious crema and complex flavors, but what you get should still tickle your fancy. It’s certainly way better than drip coffee.
Making an espresso using a Moka pot isn’t difficult, but that doesn’t mean you go at it without proper preparation. You will need a few things to get you started, including a good grinder. Also, you will have to exercise proper care all the way from preparation to brewing so as not to end up with bad-tasting coffee.
I’ll be showing the steps to follow shortly but before that, here are a few things you probably didn’t know about the Moka pot.
What Is a Moka Pot?
The Moka pot traces its roots back to Italy where it’s a staple kitchen appliance. Just by looking at it, you can tell this is a simple, cheap coffee maker. It is not as sophisticated as your typical espresso machine, but it gets the job done.
Use it well and the result will be a well-balanced brew that’s robust and hearty. It may not have crema or the smoothness of a barista-style beverage but for a device that only uses heat and pressure, that’s a fair outcome.

Take this little machine apart and you will only have four main pieces.
- The top chamber (for storing your brew)
- The inner funnel (for holding the grounds)
- A filter (to allow the brew but not the grounds to rise to the top chamber)
- The base/bottom chamber (for holding the water)
Here’s how the magic happens:
Once heated, the pot produces steam pressure that forces water through the funnel for optimal extraction. Using the same pressure, the brewed coffee then passes through the filter and through a spout before settling in the upper chamber to be collected.
This is not drip coffee; what you get from Moka pots is twice as strong as drip coffee and can even be paired with steamed milk or hot water to make a beverage of your liking.
The bigger question you’re probably asking yourself is “How do I go about preparing the perfect Moka pot espresso?”
Well, let’s see how to prepare espresso using a Moka pot.
How to Make Espresso in a Moka Pot: The Steps
What You Need
- Moka pot
- Freshly roasted coffee beans
- Coffee grinder
- Water
- Stove
- Cold towel
Step 1 — Add Water
Fill the pot’s bottom chamber with water until it levels with the valve. Be careful not to overfill the chamber, which will waterlog your coffee and dilute the flavor.
Some machines come marked with fill lines to show you the appropriate level, but if yours lacks this feature, just use the valve as your guide.
Step 2 — Grind the Beans
However good your pot is, this is a super important step you do not want to get wrong.
Aim for a fine consistency. Don’t go overboard with it because coffee beans ground too finely will clog the pot, whereas oversized ones won’t get you the perfect shot.
Another great alternative is to have your coffee beans ground at a good store near you; just be sure you have them ground frequently and store them in such a way that they stay fresh.
Step 3 — Insert the Funnel
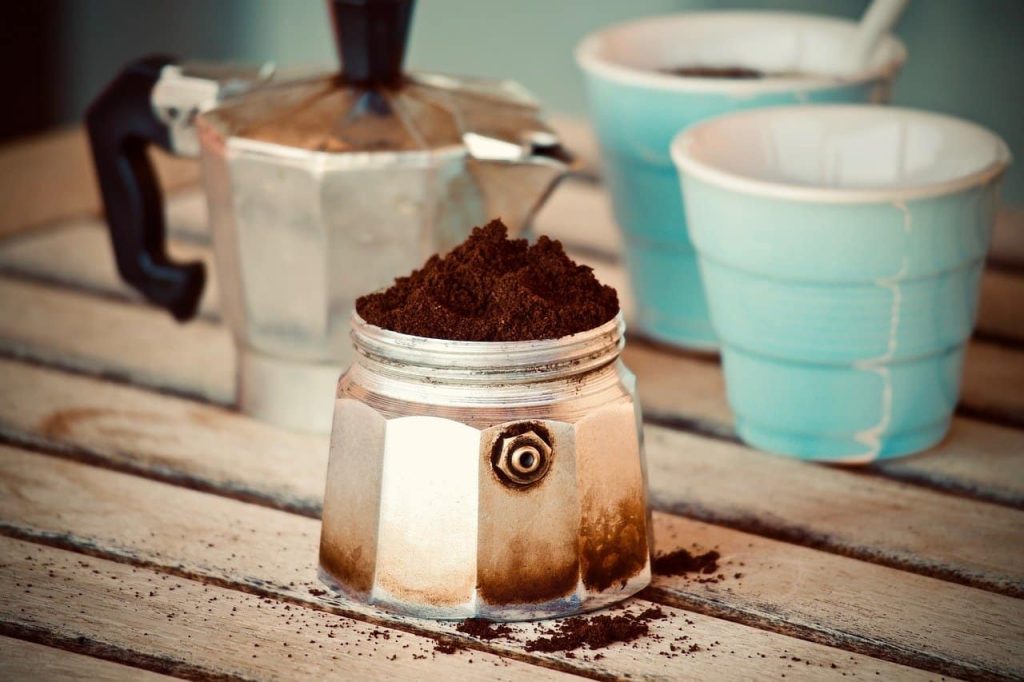
Insert the funnel; if water enters it, pour out the excess and try again. Fill it with the ground coffee.
Wipe the funnel’s edge clean so that the upper chamber screws onto it smoothly and tightly. DO NOT TAMP THE COFFEE as this will create excess pressure in your pot.
Step 4 — Attach the Upper Chamber
Screw the upper chamber to the base. You might be tempted to use the handle to help you secure it, but don’t. You risk breaking it, and it’s not replaceable. Simply hold the pot and tighten it.
Step 5 — Add Heat
Set your pot on the stove and then switch the stove to medium or low heat. Too much heat often leads to sputtering and worse, burnt coffee.
It’s important that your burner perfectly fits the base of your coffee maker, and if it’s a gas stovetop, make sure the flame doesn’t rise up on the sides of the pot. Remember to place your coffee maker in a way that the handle won’t get hot during brewing.
Step 6 — Remove from Heat
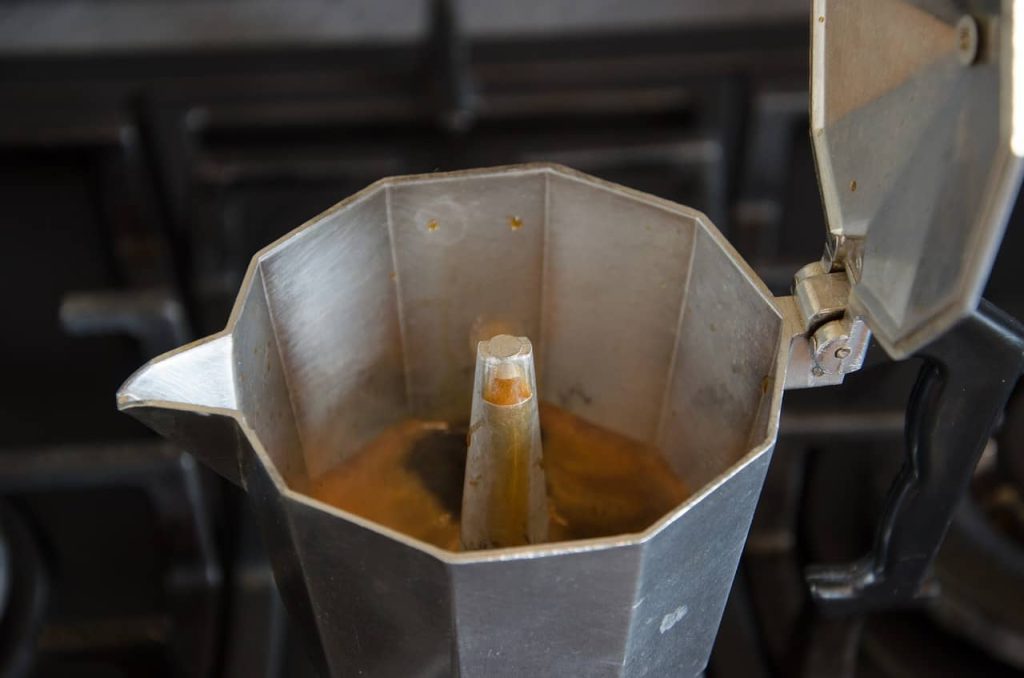
As soon as the upper chamber fills with coffee and there’s a bit of foam coming out of the spout, switch off the stove. Remove the pot from the heat immediately and place it on a cold towel. This prevents over-extracted coffee from getting into your cup.
You do not want the brew to overheat because this could lead to bitter-tasting coffee with a burnt taste.
Step 7 — Stir and Serve
Your brew is almost ready; if you like, you can stir it a little bit to ensure it’s evenly mixed. From here, you can pour and serve your brew right away.
FAQs on Moka Pot Espresso
Is Moka coffee as strong as espresso?
Coffee brewed using a Moka pot is no doubt powerful, but still not strong enough to qualify as real espresso.
The difference between the two is majorly due to pressure. Espresso is made by machines that use at least 9 bars of pressure, which is almost twice the pressure most Moka pots use. As a result, they can keep the pressure steady and consistent, leading to a full flavor and even extraction.
Eventually, you end up with a brew that’s more concentrated with complex flavors and crema.
Another downside Moka pots have is that it may be difficult to control the pressure, meaning the taste of your brews is less likely to be consistent.
Is a Moka pot worth it?
As I have just told you, Moka pots do not make authentic espresso but the resulting brew is still good enough to satisfy your taste buds. Plus, they are simple and easy to use and clean. You do not need barista-level skills and knowledge to make delicious hearty Moka pot coffee.
Since they don’t cost as much as espresso machines, you will be getting the best value for your money, which makes them worth it.
Why does my Moka pot coffee taste bitter?
Bitter coffee from your Moka pot points to one of the following situations:
- Over extraction
- Over roasted beans
- Low grade or stale coffee beans
Over extraction is the most common culprit, but the solution is simple; just extract less. This will give you a better balance of flavor and taste. Here’s how to go about it:
- Use a slightly coarser setting on your grinder
- Don’t wait until the brewing is completely done; remove the pot from the heat a few seconds earlier
- Use medium or low heat
Can I use instant coffee in a Moka pot?
Yes, but it’s not recommended. You can use instant coffee in your Moka pot, but this probably won’t get you the results you desire. Instant coffee is basically dried, frozen, ground coffee. It’s not typically ground to the preferred consistency for Moka pots, so the extraction will definitely be poor. Plus, there’s the risk of ending up with a clogged filter. For the perfect Moka pot espresso, use coffee beans that are specifically roasted for this type of brew.
Moka Pot Espresso Recap
Learning how to make espresso in a Moka pot may not be technically possible, but you can make a brew that is pretty darn close, and it’s easy to get it right too — no barista level magic needed. You just have to put in a little effort. You actually don’t need much to get started. Just get yourself a good grinder and the recommended coffee beans for espresso and then follow the steps above.
Remember the little details that matter, like not overfilling your bottom chamber with water, wiping the funnel’s edges clean, grinding to a fine consistency, and using medium or low heat. Most importantly, be careful not to let the brew overheat.
Armed with all this information, it should be easier for you to brew delicious concentrated Moka pot espresso.
Owen is a writer and editor at Caffe Streets who considers himself a coffee fanatic. He spends his time researching and testing different coffee beans and brewing methods and sharing what he learns with others.


